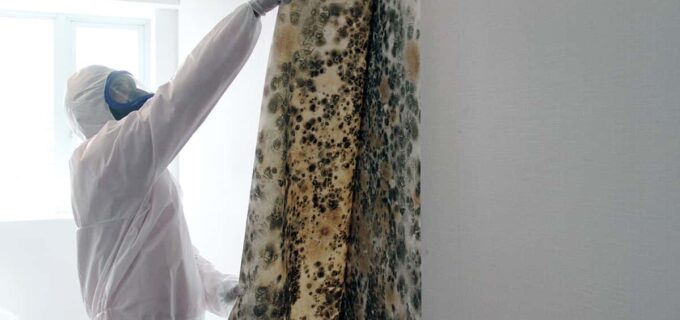
Mold colonisations, if left unchecked can cause damage to property and health. The first step in mold removal is understanding what mould is and how it reproduces and spreads. Only when you fully understand the life-cycle of mould can you effectively treat it and prevent its return.
We have taken advice from two companies offering professional mold removal services in Singapore where mould can be a particular problem due to the ambient temperature and humidity. However, it is possible to live mold free in Singapore provided the advice is followed carefully.
What is Mold?

Mold belongs to a much larger family of organisms called fungi. Some fungi are unicellular, and some are multi-cellular, the uni-cellular or single-cell varieties are known as yeasts. By comparison, due to their size and mode of reproduction, molds are classified as microbes, even though they are multicellular filamentous organisms. The filaments are known as ‘hyphae’ and will (unchecked) grow into a large colony of branching filaments called a ‘mycelium’. When a mold colony grows large enough, it becomes visible to the human eye.
Although all molds require sufficient moisture to grow, they are unlike green plants in that they do not take their energy from the sun. Instead of using photosynthesis to obtain their energy, molds obtain their nutrients by actually digesting the substrate on which they live. They do this by secreting fluids which digest the organic materials into simpler substances that can be readily taken back into the mycelium for synthesis.
Moulds reproduce and spread by producing large numbers of spores that are easily transported from place to place by air-currents or by manual cross-contamination. Once a spore finds itself on a surface that has enough moisture and nutrients, it will germinate and multiply. Then, upon reaching maturity, it will go on to create millions of more spores itself to spread even further.
When large numbers of mould spores are present in the air or on surfaces, it can be dangerous to health. Several respiratory diseases can be caused or made much worse by sensitivity to mould spores. The symptoms of mould allergies could include soreness and inflammation of the nasal passages including blocked sinuses, breathing difficulties, frequent sneezing and coughing, attacks of asthma, headaches, and in some cases skin reactions such as rashes.
How do I Spot Mold?

Visible and unsightly mould colonies will occur in buildings when humidity and temperature levels become suitable for their growth. As mentioned earlier, this is a particular problem in Singapore which is warm and experiences high levels of ambient humidity.
Which is why when the spores that are commonly present in the air land on a suitable surface they will quickly grow and colonise it. Moulds will grow quickest on surfaces that are either contaminated with organic material or on building materials that actually contain organic products such as paper, wood, natural fibres, leather and fabrics such as cotton and wool.
Apart from appearing ugly and causing stale smells or unpleasant odours, moulds will inevitably cause damage to the materials upon which they live as they slowly dissolve and absorb them to fuel their own growth and proliferation.
If a mould colonisation is either large or persistently returns, as is often the case in tropical climates like Singapore, then it will be necessary to engage the services of a professional mold removal service as quickly as possible. Before deciding on how to get rid of mold any professional mold removal company will first need to determine what species of mould they are dealing with, therefore, the first step will be diagnostic before the process of mould removal can actually commence.
Analysis and Diagnosis of Mould Prior to Removal
Mold Testing and Identification: www.iaqsg.com
Whilst it is well known that because of its climate, that there is a Singapore mold problem, it should be noted that not every problem with mold in Singapore is caused by the same species of mold. Therefore, any competent and professional mold removal service company will first want to establish exactly what species and type of mold colonisation they are dealing with.

The precise identification of a mould species and its airborne spore concentration is determined by both quantitative, qualitative and air sampling. A sophisticated air-pump with a specific flow rate is used for a specific period of time. Therefore, the amount of air moving through the air-pump can be very accurately measured. To yield statistically relevant samples with several samples will be taken from the affected area itself, a nearby area for statistical control purposes and also from outside fresh air. The air-pump will draw through a pre-determined volume of air and then filter out any suspended airborne material. The collected material is then inoculated onto a petri dish before being incubated at optimal temperature and moisture level to encourage any mould spores captured within the sample to germinate.
Following successful germination, the mould species can easily be determined by visual recognition using a low-resolution optical microscope. Although a relatively small volume of air is actually filtered for sampling purposes, the test results can also be used to quantify the actual mould densities by contrasting the spore counts obtained between the various samples and documented empirical norms. The spore count data obtained can then be extrapolated to estimate number of spores that would be present within a cubic meter of air.
Once a proper mould analysis and diagnosis has been undertaken, your professional mould removal service operator in Singapore will be able to advise you on the next steps. If deemed to be a serious colonisation with a particular species that is difficult to eradicate, then you may be advised to undertake a thorough professional mould removal process.
Alternatively, if the colonisation is not too serious or persistent, you might also be advised to consider a Do it Yourself (DIY) approach as it would be a more cost-effective solution. Therefore, we will look at how you might actually attempt a DIY intervention without incurring the cost of using a professional mould removal service in Singapore.
How to Remove Mold DIY

As mentioned, it is only when you completely understand the life-cycle of mould that you can effectively treat it and prevent its return. In this part, we will concentrate on how to get rid of mould from a Do It Yourself (DIY) perspective. Mould can be a significant problem in tropical countries and the ambient temperatures and humidity contribute to the mould problem in Singapore.
Based on the information provided, we are assuming you have decided or have been advised that you can deal with the mould colonisation yourself and will now provide you with the necessary information on how to undertake a mould removal project on your own. As with any project, the first thing you will need to do is prepare the necessary tools, equipment and chemical products for the job.
Tools Required to Remove Mold
- Latex or rubber gloves
- Safety goggles
- N-95 respirator
- Vacuum cleaner
- Scrubbing brush
- Soft paintbrush
- Safety knife
- Steel bar for leverage
- Screwdrivers
- Water sprayer
- Buckets
Materials Required to Remove Mould
- Detergent
- Liquid bleach
- Plastic rubbish bags
- Masking tape
- Plastic sheeting
Mould Removal Safety Precautions

As we learned, moulds spread easily with spores being transferred from one place to another either by air currents or directly by manual transfer. We also learned that mould spores can be hazardous to health. Therefore, when performing any kind of mould removal, it is important to understand and follow the safety instructions below.
- Wear old or disposable clothing that can either be laundered or thrown away once the work has been completed.
- Always wear a professional respirator that is N95 rated or better.
- Moisten all mouldy areas with a spray of dilute bleach before and whilst you work. This will not only prevent spores becoming airborne but also kill viable spores before they can spread elsewhere.
- Turn off air conditioning and ventilation.
Remove Mouldy Carpet
- Wear all protective clothing.
- Moisten affected carpets with a dilute solution of bleach.
- Place the carpet sections into single plastic bags and seal them.
- Then double bag the first bag of discarded carpets, seal them with tape and prepare to dispose of them safely.
Cut up mouldy, stained or musty smelling carpets into small manageable sections with your safety knife.
Seal Off the Damaged Area

If the mould damage extends beyond carpets and has extended into the structure of your property, then a more extensive intervention is called for and the following steps will be required.
- Seal the affected area off from the rest of your property and cover the doorways with plastic sheeting that has been carefully taped to the walls and floor.
- Cover all air conditioning or ventilation ducts inside the room with plastic sheeting and tape.
Open Up Mouldy Walls
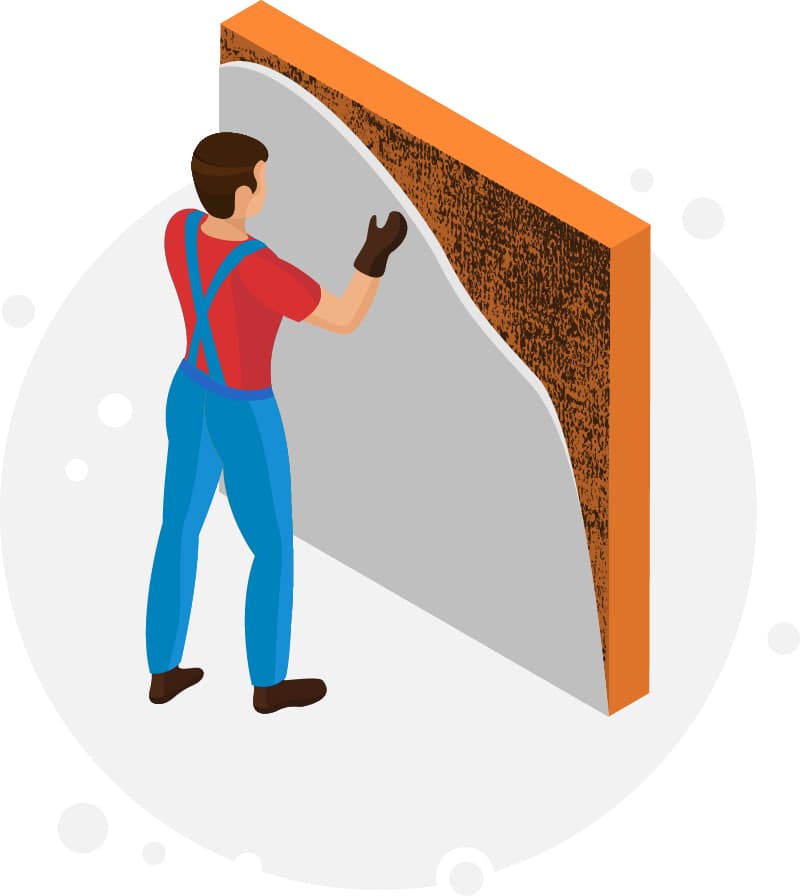
- Lever off all skirting boards and architraves from the affected areas with a metal bar and a block of wood.
- Probe and explore all damp and stained areas using a screwdriver and then begin to open up the affected areas carefully.
- As before, keep all areas moist with a dilute bleach solution.
- Carefully examine all areas and identify the whereabouts and extent of any wooden framing or insulation material affected.
Moisten and Then Bag Mouldy Materials

Once you have identified the size and scale of the mould colonisation now it is time to begin stripping out the affective area in preparation for mould removal by following the simple steps.
- Turn off the electrical power to the light and power circuits in the area.
- Moisten all surfaces that will be disturbed with a dilute solution of bleach.
- In order to avoid cutting through electrical cables ensure that you know exactly where all the cables run.
- Strip back and open up all the affected wall areas until the full extent of the mould colonisation has been exposed and can be exposed and treated.
- Once again, moisten all surfaces that will be disturbed with a dilute solution of bleach.
- Remove and carefully double-bag all mouldy material ready for safe disposal.
- Once the entire area has been exposed, stripped and the damaged material double bagged and removed from the room, assess how much repair work is required before reinstatement can commence.
- Undertake all repair work and ensure the entire affected area has been effectively cleaned and sanitised with bleach.


Mold Clean-up and Repair

Once the remedial repair work has been completed the following steps should be completed in order to safely return the area to normal without spreading mould spores to other areas.
- Once again, moisten all surfaces that will be disturbed with a dilute solution of bleach.
- The initial clean up should be undertaken by vacuuming up all the moist debris with a wet/dry vacuum cleaner.
- Remember that the vacuum cleaner will also need to be thoroughly cleaned with bleach afterwards to prevent the future release and cross-contamination of other areas with mould spores.
Scrub Mouldy Surfaces with Mould Cleaner

Once the more radical interventions for mould removal have been undertaken, then the more lightly affected areas can be treated in accordance with the following steps.
- Carefully clean and scrub all surface areas affected by mould with a fairly concentrated bleach solution to which will act as an effective mould remover as well as killing all the spores and thereby preventing the spread of the colonisation further.
- Continue to scrub surfaces with a soft brush until all visible signs of the mould have been removed.
- After scrubbing the surfaces, then allow the bleach solution to penetrate and soak into the fabric of the structure.
- Wipe off excess bleach solution but do not rinse.
- Allow all the surfaces to dry naturally.
Seal Mouldy Areas After They Dry

- Once the affected areas have superficially dried it is best to seal the areas and let them continue to dry thoroughly with the assistance of a dehumidifier.
- Regularly check the areas for any sight or smell of mould.
- At the first sign of any mould re-appearing, immediately clean and scrub the affected area with a strong solution of bleach.
Techniques for Cleaning Surface Mould

Moulds can colonise just about any surface offering a high level of humidity and a suitable supply of organic substrate for nutrition. Therefore, the following simple tips for dealing with surface mould including how to create your own DIY mould remover.
- The first step is to thoroughly clean and sanitise the affected area and proximate surrounding areas using a solution of hot water, detergent and bleach as a DIY detergent-based sanitising formulation. This is intended to remove the mould and its mycelium along with any organic residues upon which the mould might be using as a substrate for growth and proliferation.
- Once the affected areas (and the adjacent surrounding areas that might be subject to contamination by spores) have been cleaned and sanitised, all the areas need to be thoroughly disinfected using a hot solution of sodium hypochlorite (a chlorine-based bleaching agent) which will effectively kill any remaining moulds and spores. Additionally, the oxidising properties of the chlorine solution can, in most circumstances, also remove any staining and residual odours caused by the mould.
Tips for Mould Prevention
Even though the prevailing climate in Singapore is conducive to mould growth, it is possible to live mould free in Singapore by following the steps for prevention detailed below. The preventive measures fall into two broad categories, physical measure and chemical measures.
- Physical Control and Mitigation: Serious mould issues in buildings can be controlled and then mitigated in the future by a few simple good housekeeping practices. The most crucial action is to reduce Relative Humidity levels below those that facilitate mould growth. Efficiently functioning air conditioning systems are a prerequisite to controlling the Relative Humidity and indoor ambient temperatures. The USA Environmental Protection Agency (EPA) recommends that Relative Humidity should be maintained below 60% and ideally between 30% to 50%, to preclude the germination and proliferation of fungal spores. Eliminating any other sources of excess moisture such as persistent leaks is also one the most important steps that can be taken to control mould growth. The use of High-Efficiency Particulate Air (HEPA) filters can also reduce the airborne density of the mould spores available for germination. Finally, it may also be necessary to remove any affected materials and replace them with inorganic or antimicrobial alternatives.
- Chemical Treatment: Once the surfaces have been cleaned, sanitised and treated with a bleach solution, there is a need to prevent any re-colonisation of the mould. Assuming all the physical control and mitigation actions have also been successfully implemented, then this final step is best achieved by the widespread application of an organo-silane based antimicrobial surface coating. This provides long-term protection against all known microbes, including moulds, yeasts, bacteria and viruses on a 24/7 basis for up to six months.


Before & After Mold Remediation
Post Remediation Evaluation and Assessment of Mold
Following all the treatment protocols described above, it is also necessary to monitor the situation closely to ensure that the potential for any mould re-colonisation is precluded. This is undertaken with a regular integrated sampling approach including the measurement of ambient temperatures, relative humidity and air-sampling for spore density in the air.
Related Posts
- Mold Invading Premises Post Circuit Breaker
- Mold Growth on Pipes in Stairwell Decontaminated and Coated with BR Shield Antimicrobial
- Mold Growth Due to High Humidity
